3.8 為它加上Swagger
專案地址:https://github.com/EDDYCJY/go-gin-example
涉及知識點
- Swagger
本文目標
一個好的 API's,必然離不開一個好的API文件,如果要開發純手寫 API 文件,不存在的(很難持續維護),因此我們要自動生成介面文件。
安裝 swag
$ go get -u github.com/swaggo/swag/cmd/swag
若 $GOROOT/bin 沒有加入$PATH中,你需要執行將其可執行檔案移動到$GOBIN下
mv $GOPATH/bin/swag /usr/local/go/bin
驗證是否安裝成功
檢查 $GOBIN 下是否有 swag 檔案,如下:
$ swag -v
swag version v1.1.1
安裝 gin-swagger
$ go get -u github.com/swaggo/gin-swagger

$ go get -u github.com/swaggo/gin-swagger/swaggerFiles
注:三個包都有一定大小,安裝需要等一會或要科學上網。
初始化
編寫API註釋
Swagger 中需要將相應的註釋或註解編寫到方法上,再利用生成器自動生成說明檔案
gin-swagger 給出的範例:
// @Summary Add a new pet to the store
// @Description get string by ID
// @Accept  json
// @Produce  json
// @Param   some_id     path    int     true        "Some ID"
// @Success 200 {string} string    "ok"
// @Failure 400 {object} web.APIError "We need ID!!"
// @Failure 404 {object} web.APIError "Can not find ID"
// @Router /testapi/get-string-by-int/{some_id} [get]
我們可以參照 Swagger 的註解規範和範例去編寫
// @Summary 新增文章标签
// @Produce  json
// @Param name query string true "Name"
// @Param state query int false "State"
// @Param created_by query int false "CreatedBy"
// @Success 200 {string} json "{"code":200,"data":{},"msg":"ok"}"
// @Router /api/v1/tags [post]
func AddTag(c *gin.Context) {
// @Summary 修改文章标签
// @Produce  json
// @Param id path int true "ID"
// @Param name query string true "ID"
// @Param state query int false "State"
// @Param modified_by query string true "ModifiedBy"
// @Success 200 {string} json "{"code":200,"data":{},"msg":"ok"}"
// @Router /api/v1/tags/{id} [put]
func EditTag(c *gin.Context) {
參考的註解請參見 go-gin-example。以確保取得最新的 swag 語法
路由
在完成了註解的編寫後,我們需要針對 swagger 新增初始化動作和對應的路由規則,才可以使用。開啟 routers/router.go 檔案,新增內容如下:
package routers

import (
    ...

    _ "github.com/EDDYCJY/go-gin-example/docs"

    ...
)

// InitRouter initialize routing information
func InitRouter() *gin.Engine {
    ...
    r.GET("/swagger/*any", ginSwagger.WrapHandler(swaggerFiles.Handler))
    ...
    apiv1 := r.Group("/api/v1")
    apiv1.Use(jwt.JWT())
    {
        ...
    }

    return r
}
生成
我們進入到gin-blog的專案根目錄中,執行初始化命令
[$ gin-blog]# swag init
2018/03/13 23:32:10 Generate swagger docs....
2018/03/13 23:32:10 Generate general API Info
2018/03/13 23:32:10 create docs.go at  docs/docs.go
完畢後會在專案根目錄下生成docs
docs/
├── docs.go
└── swagger
    ├── swagger.json
    └── swagger.yaml
我們可以檢查 docs.go 檔案中的 doc 變數,詳細記載中我們檔案中所編寫的註解和說明 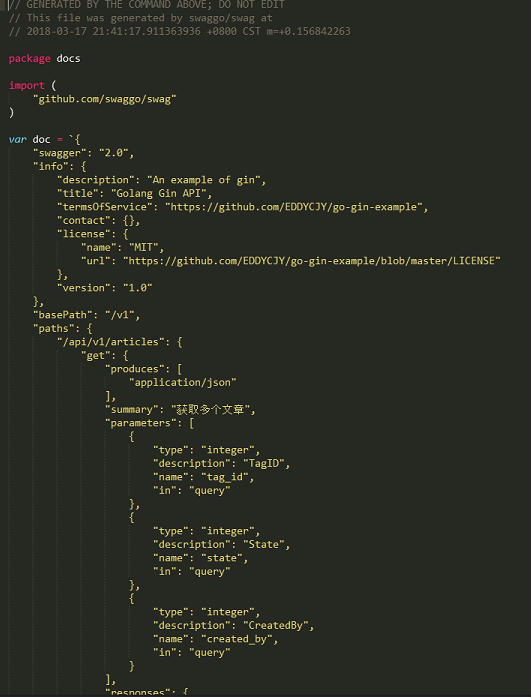
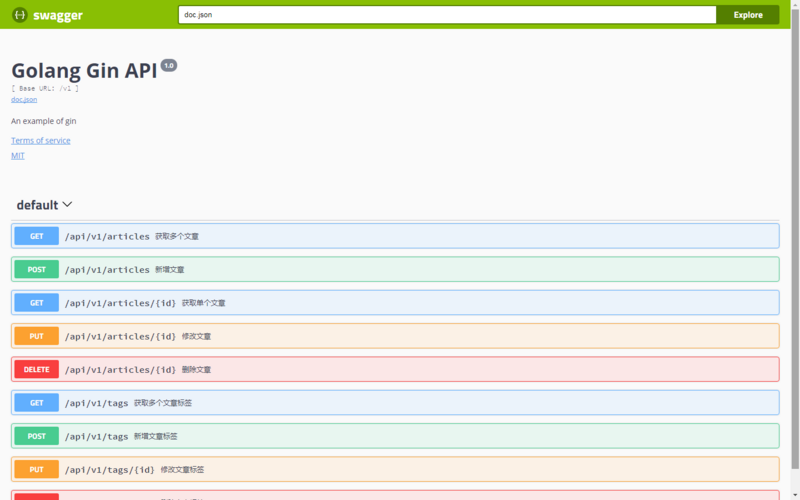
驗證
大功告成,訪問一下 http://127.0.0.1:8000/swagger/index.html, 檢視 API 文件生成是否正確
參考
本系列示例程式碼
關於
修改記錄
- 第一版:2018年02月16日釋出文章
- 第二版:2019年10月01日修改文章
?
如果有任何疑問或錯誤,歡迎在 issues 進行提問或給予修正意見,如果喜歡或對你有所幫助,歡迎 Star,對作者是一種鼓勵和推進。
我的微信公眾號