
出處 : https://medium.com/@a37708867/pytorch-7b9fe2f5f8ed
PyTorch
Reduce inference costs by 71% and drive scale out using PyTorch, TorchServe, and AWS Inferentia. Pushing the state of…
pytorch.org
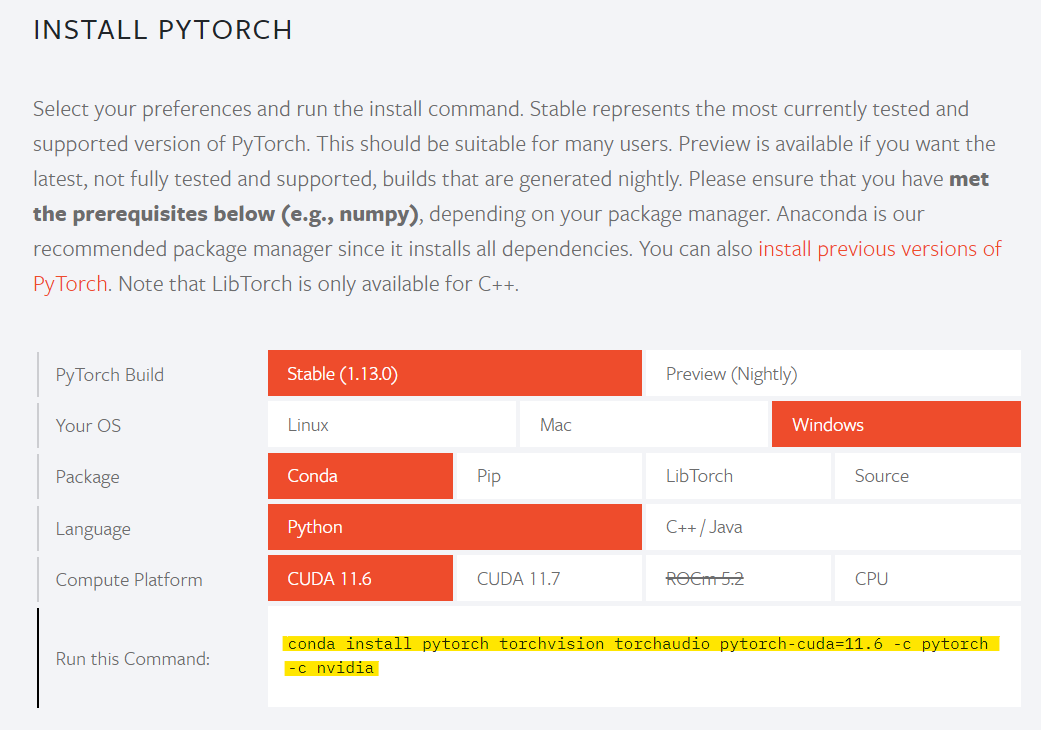
選擇自己需要而且匹配的版本即可複製指令(黃線)
//版本會隨時間更新所以還是以官網為主
//選擇與論文設計相符的通常比較不會出錯
//最新版本通常不穩定所以選擇較舊的版本
$ conda install pytorch torchvision torchaudio pytorch-cuda=11.6 -c pytorch -c nvidia
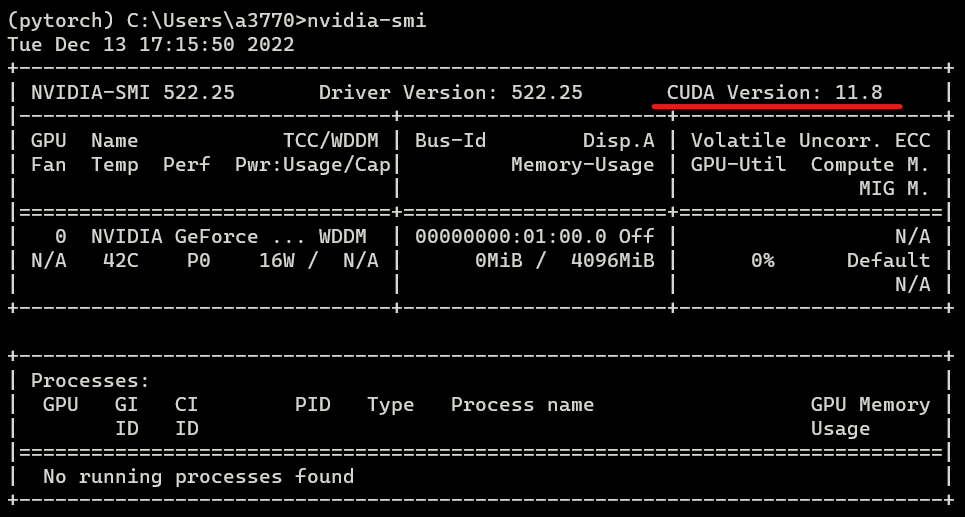
不確定自己的CUDA版本怎麼辦? 可以開啟 nvidia 驅動程式或是輸入以下指令。
$ nvidia-smi
https://pytorch.org/
CUDA Version 為 11.8
使用 Jupyter notebook來測試
更新套件
更新 Anaconda
$ conda update anaconda
更新 Jupyter notebook
$ conda update jupyter
更新 pip
$ python -m pip install --upgrade pip
檢視 Kernel
查看已建立的 Jupyter Kernel
$ jupyter kernelspec list
建立新 Kernel
//一定要先建立好虛擬環境並進入
$ conda activate pytorch

//下面提供兩種方法可以建立新的 Kernel
//方法一
$ pip install ipykernel
//python -m ipykernel install --user --name <kernel_name> --display-name "<kernel_name>"
$ python -m ipykernel install --user --name pytorch --display-name "pytorch"

//方法二
//可以直接執行建立新的 Kernel
//ipython kernel install --user --name="<kernel_name>" --display-name="<kernel_name>"
$ ipython kernel install --user --name="pytorch" --display-name="pytorch"


可從上面看出兩個指令皆會下載到相同位置,但方法一需要先使用 pip 下載 ipykernel 的模組。
刪除 Kernel
//jupyter kernelspec remove <kernel_name>
$ jupyter kernelspec remove pytorch
開啟 Jupyter notebook
使用 cd 指令到你想要的資料夾並開啟 Jupyter notebook。
$ jupyter notebook
在 Jupyter notebook 寫幾行指令測試 Pytorch
.ipynb
是 Jupyter notebook 使用的檔案的副檔名,可以逐行執行指令,並且會將已執行過的指令儲存起來,適合用來 trace 別人的 code ,或學習使用。
建立一個新的檔案
注意要使用剛剛建立的 kernel,才會測試的到,不然剛剛的設定都白做了。
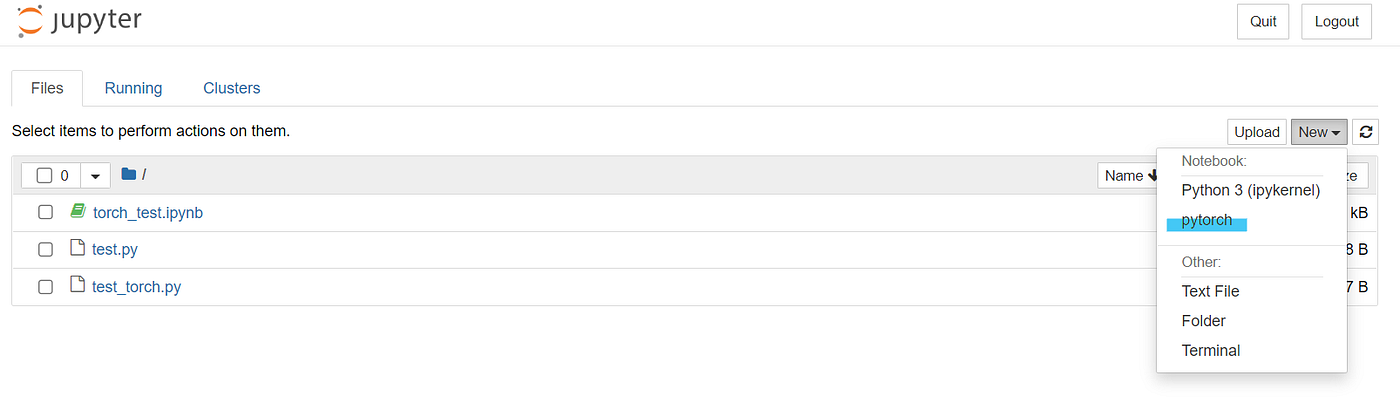
點選藍色畫記處
輸入指令
import torch

torch.cuda.is_available()
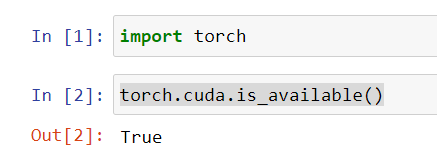
表示 Pytorch 可以正常執行
完成 Pytorch 的下載啦,原則上本篇主要是 Jupyter notebook 的使用,只有少部分篇幅說明下載和測試,花了那麼多的步驟其實是為了以後管理方便,不需要的虛擬環境和 Kernel 可以隨時砍掉重來。
其實這個部分應該會比較少用到,通常設定完久久才會刪,有需要再回來看吧。